
Showing posts with label Reborn/Dolls. Show all posts
Showing posts with label Reborn/Dolls. Show all posts
New information about Knitting Pattern for Les Cheries
I tried the set of the tank top on Paola Reina doll. Both the tank top and skirt fit her. Now for Ann Estelle doll, tank top fits perfectly, but skirt a bit big. I will try it out, but it looks like 6-8 sts less will make it fit.


Les Cheries need cloths

I made a up a pattern for a tank top and skirt, nothing extravagant, just something. I then when ahead and knit the set up again for the Holiday celebration. They are both such simple patterns you can make them different lengths, add a border pattern, fancy stitches to change the whole look.

Tank top
*fingering weight yarn
*US 2 (3mm)
Cast on 56 stitches
-Knit row 1 & 2 in ribbing: K1, P1
-Row 3: K1, P1, K7, cast off 13, K5, K2tog, K5, cast off 13, K6, P1, K1
-Row 4: K1, P8 to gap, cast on 5, P11 to gap, cast on 5, P8 to last st, K1- -Row5: K1, P1, K to last 2 sts, P1, K1
-Row 6: K1, P to last st, K1
*Repeat row 5 & 6 til desired length. I finished with 4 rows of garter stitch
Cast off

Skirt
*fingering weight yarn
*US 2 (3mm)
Cast on 50 sts-Knit in the round
Knit 4 rows of ribbing K1, P1
Knit until desired length. I ended with Purl one row, Knit one row and then end with purl one row
cast off
Okay I know these are not anything real special and I posting my notes to share with other doll knitters. Please, don't make me regret it. These are for your use or you can make them to sell, but please! Don't post these patterns as your own or sell them. I would love to see what you guys make with these patterns. They knit up very quick. I used snaps on the above top, but am going to try one with hook and loop tape, to see how it goes.
Les Cheries Doll Eye Lid fix

Well, I finished up painting the eye lids. It was pretty easy. I put the one I am working on (no top) next to the one that is mine. I think I did very well. It does show up a little more when you are right here to look, but it is very good. I bought two colors of paint and to very small brushes. I would use the finest one you can find, then I would have been able to paint the eye lid out closer to the edges without touching the vinyl doll. The lighter color of the two pictured below, of paint worked great. When it dried it dried a little bit darker than when putting it on and that worked perfect. I have never repaired a doll before that the paint was scratched of the eye lids, but I did really well.


Let's do Les Cheries Hair

Let's work on her hair. This is my hair supply box. I have kinda collected many items that I use and just found a plastic box to keep them in.

I used the foam curlers. I should have used the little papers you use to roll up hair, it prevents the ends from getting frizzy and makes it much easier to roll up. I did it this way because I was going to put a little flip to the ends. The Les Cheries hair is very easy to play with. If your dolls hair is clean, then just wet it down, I use a little spray bottle with water. Then use the curling method and leave it to dry. Then if you want the curls out because you want a new style or you don't like what you did, just wet it down again.

Okay below is a picture of some of my items. The foam curlers are very inexpensive. You can find the papers in the store right by the hair curlers. I also have strips of fabric, those work very well to get a very tight curl.


Tah-dah! Now she looks like a new girl. I do still have a touch up to the eye lids. I am going to try to find a matching paint. They painted the eye balls there and that makes them look like lids and then they glued on eyelashes. So knowing that, you can touch up the eyelids. The eye lids have a scratch on each one. I can't think of why that would happen?
Isn't she looking wonderful? I will give the eye lids a try and then I am going onto knitting an outfit and then sew an outfit, so stay tuned.

Doll Make over Part 2

lets get started. I then take a damp paper towel and just a touch of hand soap, shampoo or dish soap and wash her whole body. This often takes off a lot.
Then onto some of the more difficult ink stains, dark spots, paint, red marker and more. I purchase the Magic Eraser or in the case below, I found a box for 3.99 at Walgreen's and then I cut a piece off. I first dampin one end and rub it on spots, the more difficult spots need the dry side and some elbow grease. Remember to not use it on parts of the body where there is painted on eyes or finger nail color, it can take it off.


I was able to get all the stains off with this method, even the red marker, white paint on one shoulder, dark stain on another shoulder, pen mark on the foot and more! What a wonderful tool.

I have had an occasion when even the magic eraser did not work. I think use a little dab of Clearasil. Yes, pimple cream with 10% Benzoyl Peroxide. You put a dab on the spot and set it under a lamp that gives off heat for 1/2 hour to 1 hour and then take the lamp off and let the doll sit with the cream on over night. This has worked for me. My daughter had a cheap desk lamp that really gives off the heat and it works terrific. If it lightens, but doesn't take away, try it again.
Maybe some of you have some tips, please share.
Tomorrow I will style her hair and show you my hair kit.
Helping dolls in Need

I really enjoy several things, one of which is dolls. I found the challenge of taking a doll in need and helping her come back to her beauty is fun. I have found dolls on ebay that have problems and sell cheap, then trying to fix them up. I have done several American Girl dolls- Bitty Baby and Bitty twins. I have read as much as I can for each problem each doll has. I decided to share so maybe someone else would like to do one of their own. Maybe you would like to add to your collection, but don't have the money to buy new. I just purchased a Corolle 2001 doll called Les Cheries. I purchased her for (6.99 for doll and 8.99 shipping) 15.98 and that includes shipping. Now once you see all that is wrong with her you may feel it is to much.

Her hair is a mess, some real tangles. You can't see it very well from the pictures, but when the eyes are closed someone has scratched some of the skin color of the eye lids.

Above there is ink by the top arrow, something red by the second and a black spot by the 3rd arrow.
Below there is a red spot.


Another black spot above and below a pen mark. There is a lot of little dots and some dirt. Anyone who has had a vinyl doll knows just how hard it is to get ink and black marks, spots, stains out. I am not an expert, but am going to share somethings that I have learned.

The very first thing to do is wash hair. I like to use warm water a dimes worth of shampoo and wash, then add a tiny bit of conditioner after rinsing out the shampoo. Then rinse conditioner.

Next I take a paper towel and a tad bit of soap and wash the doll all over except hair. Then you will find out how much is left to deal with.
I am going to post the next part of this tomorrow, so stop back.
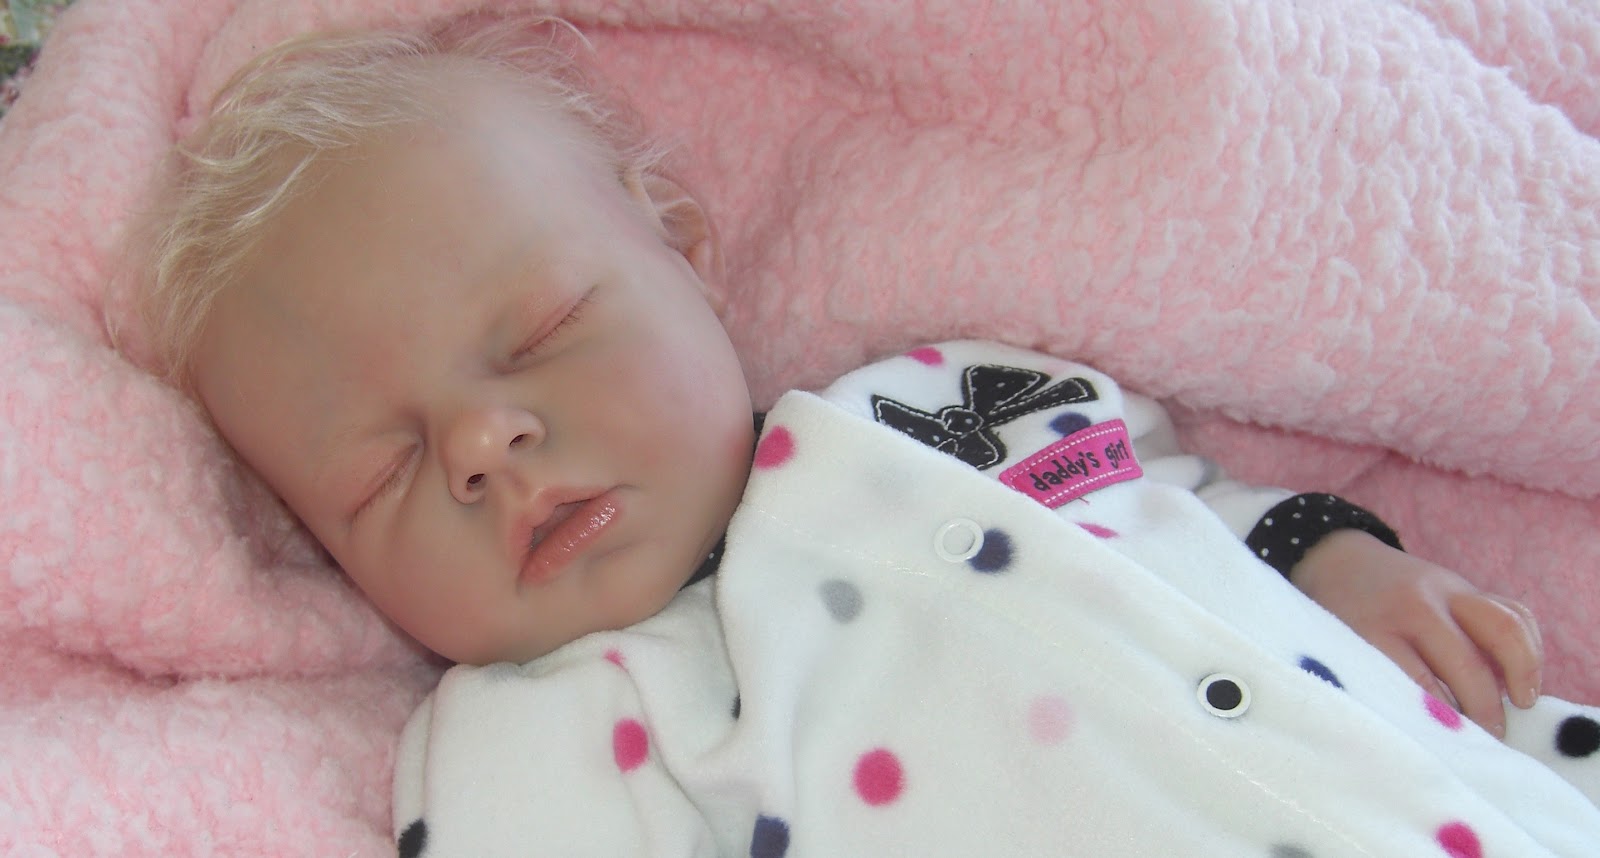
My Reborn

This is my reborn. If you don't know what a reborn is.... it is a doll that has been painted and styled to look like a real baby. I really think that the ladies who spend weeks doing these dolls are artists. They come with hair that looks real, with eyelashes, even their finger nails look real. There hands and feet are a soft rubber to feel more real. You can opt for a body that is of the same rubber or plastic (whatever it is made from) I chose for a soft body. They fill them with something that makes them feel like they are real, even the had moves at the neck like a newborn. I am naming mine Abagail not sure on the spelling yet (Abbegail, abbagail, Abbigayle). I am not sure, do any of you have suggestions on the spelling? I will probably call her Abby for short. She takes newborn clothes, so I am really looking forward to knitting and sewing for her.
~Julie



Subscribe to:
Posts (Atom)
Follow Me


JoolieSews on FaceBook

Come Join the Group
SVG Cuts
 I love their files and tutorials.

